DeutschEnglish

Submenu

 - - - By CrazyStat - - -

21. March 2013

Linux: ACPI disabled, won’t shut down, /sys/class/rtc/rtc0/wakealarm vanished

Filed under: Linux — Tags: , , , , , , , , , , , — Christopher Kramer @ 00:16

MythTV server won’t shut down automatically any longer

Today my mythTV based media homeserver suddenly would not automatically shutdown any longer after a kernel update.

Logs by mythbackend (/var/log/mythtv/mythbackend ) that triggers the shutdown  looked like this:

localhost mythbackend[1674]: I Scheduler scheduler.cpp:2729 (CheckShutdownServer) CheckShutdownServer returned - OK to shutdown
localhost mythbackend[1674]: N Scheduler scheduler.cpp:2814 (ShutdownServer) Running the command to set the next scheduled wakeup time [...]
localhost mythbackend[1674]: E Scheduler scheduler.cpp:2820 (ShutdownServer) SetWakeuptimeCommand failed, shutdown aborted

Problem: /sys/class/rtc/rtc0/wakealarm vanished after kernel update

So I ran the SetWakeupTime command myself and go this problem:

/sys/class/rtc/rtc0/wakealarm: No such file or directory

And in fact the file was missing.

System won’t power off any longer

I tried to shut down the pc completely (manually) and start it again. But it wouldn’t power off, it just freezed with the shutdown bar on the screen. Pressing the power button once (only short, not holding it) made the PC power off.

So this looked like some big ACPI problem.

ACPI disabled

After some more search, I found this in the syslog (/var/log/syslog):

localhost kernel: [    0.000000] ACPI: no DMI BIOS year, acpi=force is required to enable ACPI
localhost kernel: [    0.000000] ACPI: Disabling ACPI support

So no ACPI support explains why wakealarm and shutdown is broken.

I am wondering why this happens suddenly after a kernel update (I have not changed my BIOS or something and ACPI was perfectly working before).

Solution: force ACPI

Forcing ACPI solved the problem.

If you use grub2, this is how to do it:

Open /etc/default/grub (e.g. “sudo nano /etc/default/grub”) and update this line:

GRUB_CMDLINE_LINUX_DEFAULT="quiet splash"

Into this:

GRUB_CMDLINE_LINUX_DEFAULT="quiet splash acpi=force"

Save the file and update the grub configuration:

sudo update-grub

Then restart and you’ll be done.

sudo shutdown -r now

I hope this could help somebody.
Recommendation

Try my Open Source PHP visitor analytics script CrazyStat.

30. January 2013

Nagios / Icinga: Monitor (local) memory usage

Filed under: Linux,Server Administration — Tags: , , , , , , , , , , , , , — Christopher Kramer @ 17:55

Nagios and its fork icinga are great monitoring tools. They come with a bundle of plugins to monitor standard services such as HTTP, SMTP, POP3, load and stuff like that. And there are lots of 3rd party plugins available for almost everything else you can think of.

But one standard thing that is missing in the official nagios-plugins package is a plugin to check memory usage (of the local machine).

So here is how to install one. I assume a Debian system with Icinga running – you might want to adjust paths for other distros or nagios.

  1. Download the plugin here
    e.g. from the shell:

    wget https://exchange.icinga.com/exchange/check_memory/files/784/check_memory.pl
  2. Then move the file to the other plugins
    mv check_memory.pl /usr/lib/nagios/plugins/check_memory.pl
  3. Make it executable
    chmod +x /usr/lib/nagios/plugins/check_memory.pl
  4. Try to run it:
    perl /usr/lib/nagios/plugins/check_memory.pl -w 50% -c 25%
  5. This should give something like “CHECK_MEMORY OK – […] free […]”. If an error occurs, you probably need to install the perl module Nagios::Plugin. On Debian, the easiest way is:
    apt-get install libnagios-plugin-perl

    On other distros, you might use CPAN:

    perl -MCPAN -e 'install Nagios::Plugin'

    This will ask you lots of questions and install lots of dependencies (where you should say “yes”).

  6. Configure the check_memory command. To do this, create a file /etc/nagios-plugins/config/memory.cfg with this content:
    # 'check_memory' command definition
    define command{
            command_name    check_memory
            command_line    perl /usr/lib/nagios/plugins/check_memory.pl -w $ARG1$ -c $ARG2$
            }
  7. Now you can use the check_memory command to define a service. For example, add this to /etc/icinga/objects/localhost_icinga.cfg (assuming you define localhost-services there):
    define service{
            use                             generic-service
            host_name                       localhost
            service_description             Memory
            check_command                   check_memory!50%!25%
            }

    This will send you a warning when memory usage is 50% and critical when only 25% is free. You might want to adjust these values of course depending on what is normal on your system and how early you want to be notified.

  8. Check your configuration:
    /usr/local/icinga/bin/icinga -v /etc/icinga/icinga.cfg
  9. Restart Icinga / Nagios if the preflight-check was okay:
    /etc/init.d/icinga restart

This should be it.

I hope this helped somebody.

To monitor memory usage of a remote server, you’ll need SNMP for example. Maybe I’ll post another blog post on this soon.

11. September 2012

Zimbra: Setting up a free (real) “commercial” SSL certificate

Filed under: Linux,Security,Server Administration — Tags: , , , , , — Christopher Kramer @ 20:40

I recently wrote about how to configure a new self-signed certificate for Zimbra.

Today I want to explain you how you can do even better and setup a real SSL certificate by Startcom which will make those annoying browser warning messages go away 😉 And the best: It is all for free, thanks to Startcom! It is also important to have a real SSL-certificate for use with most smartphones.

Please note that you have to respect Startcom’s certificate policy, which might require a non-free class 2 certificate for your commercial use. See the policy for details. Thanks to Thomas for this remark. With “commercial” certificate, I here mean a “real” CA-signed certificate, which Zimbra calls “commercial”, no matter whether used in a commercial context or not.

First, create a Certificate Request (CSR) in Zimbra. To do so, ssh into your server, login as root and issue a command like this:

/opt/zimbra/bin/zmcertmgr createcsr comm -new -keysize 2048 -digest sha256
-subject "/C=US/ST=CA/L=Sunnyvale/O=Yahoo/OU=Zimbra Collaboration Suite/CN=host.example.com"
-subjectAltNames host.example.com

This is one line. What is important here, is that you use the domain name for which the certificate should be issued at the end (instead of host.example.com). Startcom will ignore everything else anyway, so you can leave country, state, organization and so on as is or change it, doesn’t matter. What is also important is that you define a keysize of 2048 as Startcom won’t accept 1024 bit keys anymore. This parameter is not documented in the wiki yet, and seems to be available for newer versions of Zimbra only. With a little trick, it should also be also possible for older versions of zimbra such as 5 (but better update to the new version anyway…).

Next thing you do is register at startcom if you do not have an account yet. You’ll get an S/MIME certificate by Startcom for free which you need to login to their control panel. Your browser will generate the secret certificate and store it in its internal storage. I’d recommend you to backup this certificate – you will not be able to login into your startcom account if you loose it.

Then at startcom, you use the validation wizard to validate your domain. This will send a mail to postmaster/hostmaster/webmaster@host.example.com (you can choose which one) with host.example.com being your domain. So you need access to one of these mailboxes to prove that you own the domain.

Then use the certificate wizard at Startcom to create a new certificate. Skip the certificate creation step! Instead, past the CSR created by Zimbra ( /opt/zimbra/ssl/zimbra/commercial/commercial.csr ) into the webform. (Better always create private certificates yourself, never use certificate generators by somebody else, not even the CA.)

Once the certificate is created by Startcom (usually takes some minutes), install it as described in the zimbra wiki:

  1. Store the new (public) certificate you get from Startcom somewhere (e.g. /root/commercial.crt )
  2. Download the root CA certificate
    wget -O /root/ca.pem https://www.startssl.com/certs/ca.pem
  3. Download the intermediary certificate from startcom
    # If your certificate is class 1:
    wget -O /root/ca_intermediary.crt https://www.startssl.com/certs/class1/sha2/pem/sub.class1.server.sha2.ca.pem
    # If your certificate is class 2:
    wget -O /root/ca_intermediary.crt https://www.startssl.com/certs/class2/sha2/pem/sub.class2.server.sha2.ca.pem
  4. Combine them:
    cat /root/ca_intermediary.crt /root/ca.crt > /root/ca_chain.crt
  5. Verify your certificate:
    /opt/zimbra/bin/zmcertmgr verifycrt comm /opt/zimbra/ssl/zimbra/commercial/commercial.key /root/commercial.crt /root/ca_chain.crt
  6. Deploy your certificate:
    /opt/zimbra/bin/zmcertmgr deploycrt comm /root/commercial.crt /root/ca_chain.crt
  7. Check:
    /opt/zimbra/bin/zmcertmgr viewdeployedcrt
  8. Restart Zimbra
    su – zimbra
    zmcontrol stop
    zmcontrol start

I hope this post was useful so some of you. If you have problems with one of the steps, just ask in the comments.

Read here how to redirect http to https to enforce the use of https.

9. September 2012

Zimbra: Creating a new self-signed SSL certificate

Filed under: Linux,Server Administration — Tags: , , , , , , , , , — Christopher Kramer @ 10:04

I recently had to recreate the SSL certificate of a Zimbra server and surprisingly it was not as easy as the documentation looked like, so I’d like to document how it is done and make comments on some difficulties that might come up.

So this is how it is done (on a Ubuntu Server running Zimbra Network edition 6.0.16 GA):

  1. SSH into the server, login as root
  2. Switch to the zimbra-user using
    su - zimbra
  3. Then run the following commands:
     sudo /opt/zimbra/bin/zmcertmgr createca -new
     sudo /opt/zimbra/bin/zmcertmgr deployca
     sudo /opt/zimbra/bin/zmcertmgr deploycrt self
  4. Restart Zimbra. To do so, as user zimbra, issue these commands (no sudo here):
    /opt/zimbra/bin/zmcontrol stop
    /opt/zimbra/bin/zmcontrol start

So the difficulties I had and some remarks:

  • sudo kept asking me for a password when I typed in
    sudo zmcertmgr createca -new

    Seems I am not the only one with this problem. The zmcertmgr command is white-listed in /etc/sudoers so you should normally not be asked for a password. Run the following command to edit /etc/sudoers (do not edit it in any other way!)

    visudo

    So make sure in this file the following line is included:

    %zimbra ALL=NOPASSWD:/opt/zimbra/bin/zmcertmgr

    The % at the beginning seems to belong there. Note that the zimbra wiki has typo (zmvertmgr) in this line.
    But although I had this line in there, sudo kept asking me for the password. So what finally worked was invoking zmcertmgr with the complete path (as done above).
    Update: It seems I had a typo in here myself. Make sure it is “zmcertmgr”  and not “zmzertmgr” 😉
    Thanks to the comment by erolha!

  • In the Zimbra Release notes, the last command for updating the certificate is
    sudo zmcertmgr deploycrt self -new

    I got this error:

    Can't deploy cert for -new.  Unknown service.

    Without -new (and the complete path), it went through well.

  • No zimbra documentation I found mentions that a restart of zimbra is required, but without a restart, the old certificate was still used when opening the webmailer or the admin interface via https.


I hope I could help some of you that run into one of these problems.

19. August 2012

MythTV: DVD playback does not work

Filed under: Linux — Tags: , , , , , , — Christopher Kramer @ 00:09

A colleague of mine who is currently setting up Mythbuntu (MythTV) as a media center PC contacted me today because he had a problem with DVD playback in MythTV. When selecting DVD-playback, just nothing happend.

I first asked him to make sure the DVD drive is working and the DVD can be mounted and he confirmed it works (you should check as well).

Then I asked him to launch MythTV from the console (e.g. in Gnome Terminal, run “mythfrontend”) and try to play the dvd and see whether an error message is logged in the terminal window. And in fact MythTV complained:

faild to open device at /dev/dvd

I asked him to send me the list of his devices using:

ls /dev

This showed up no device “dvd” (the dvbt-stick created a “dvb”-device, so not get confused with that). The dvd-device in fact had the name “dvd1”. So with this knowledge, the problem is easy to fix:

ln -s /dev/dvd1 /dev/dvd

So this creates a symbolic link so /dev/dvd1 can be accessed using /dev/dvd as well so MythTV is pleased.

Hope this helps some of you.


7. August 2012

Flash on the Raspberry Pi

Filed under: Linux,Raspberry Pi — Tags: , , , , , , , , — Christopher Kramer @ 17:14

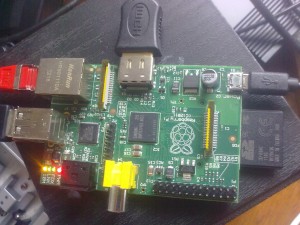
The Raspberry Pi is a cool tiny board with a ARM CPU and lots of interfaces like HDMI, USB and Ethernet that runs Linux and costs only about 30€. If you have not heard if it, you should have a look at it, it’s just a very cool gadget to play around with or build your own devices. I got mine about a month ago but unfortunately did not have a lot of time to play with it, but am doing a bit from time to time, so you might hear some more stuff about it soon.

That’s what (mine) looks like:

Lots of people say having flash on the raspberry pi would be cool but then others claim it’s impossible to realize. In the Raspberry Pi forum, user “Aux” writes:

There is absolutely no way of getting Flash for RasPi. Adobe is a closed-source developer and the only version they made for ARM CPUs is Android one which requires ARMv7 CPU with NEON extension. That makes RasPi unable to run it even if someone ports Android.

That’s a reasonable thought and I thought the same way. But then I talked to a friend of mine and he said “well, what about Gnash? Does it run on the raspberry Pi?”

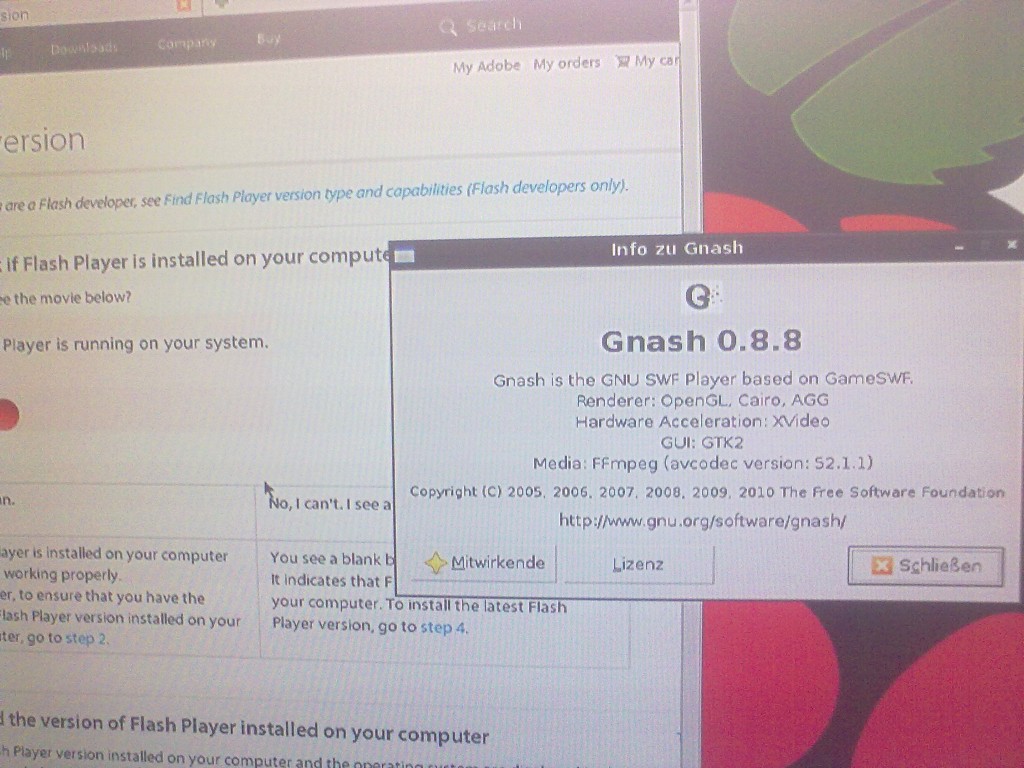
And so I went straight home and installed Gnash on my Raspberry Pi. And it works 🙂

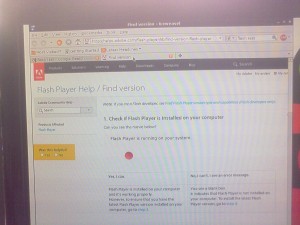
Opening Adobe’s Flash test page looks like this:

The red ball indicates that Flash is working.

So what is gnash? Well, this is what the Debian repository description says:

GNU Gnash is a free GPL’d SWF player. It runs as a standalone application on either the desktop or embedded devices, or may be used as a plugin for several popular browsers. It supports playing media from a disk or streaming over a network connection.

GNU Gnash is based on GameSWF and supports most SWF v7 features and some SWF v8 and v9. SWF v10 is not supported by GNU Gnash.

Included in the Gnash is an XML based messaging system, as specified in the SWF specification. This lets a SWF animation communicate over a TCP/IP socket, and parse the incoming XML message. This lets an animation be a remote control for other devices or applications.

As there is an ARM package of Gnash, it installs fine on Debian for the Raspberry Pi.

Here is how you install Gnash for Flash support in the browser:

sudo apt-get install iceweasel browser-plugin-gnash

So this will get you a Mozilla-based browser called iceweasel (just like Firefox) that plays Flash.

Well, this is the theory. Reality is that going to youtube with that and trying to play a movie is just a pain. It eats up the whole CPU and hangs for hours until the 5 minutes movie is through.

But simple Flash animations should work fine. Have a try and enjoy your raspberry Pi!

Note that I still used Debian Squeeze and not yet the special Raspbian distro that is reported to run faster. I will have a try with the new version soon to see whether Gnash works reasonably fast on the new version.


14. May 2012

Mount clonezilla image to restore single file (browse)

Filed under: Linux,Windows — Tags: , , , , , , , , , , — Christopher Kramer @ 12:28

Clonezilla is a fine tool to backup/restore/clone partitions or drives. It is very powerful, can handle both Linux and Windows partitions and so on. If you do not know it, you should really give it a try. It is really free software (open source), which means it is also free to use for commercial purposes.

By the way, if you want to backup/restore images of Windows partitions/drives, I’d also recommend DriveImage XML which is also very powerful yet simple (only free for private use). Windows 7 has also built-in backup and imaging tools, which you can give a try. But this post is about Clonezilla.

One important feature that Clonezilla does not offer out of the box is browsing images to restore single files. You can only restore complete partitions or drives.

But there is a way around this, which is discussed in this forum thread, although not perfect as it requires lots of time and disk space as well.

The basic approach is to convert the whole image into a (probably huge) img-file that can be easily mounted. In the forum post linked above several different commands are discussed depending on your image file.
Here I’d like to show you what worked for me.

In my case, the file was compressed using gzip and it was an image of a linux partition (ext3). I used Ubuntu Linux to mount the image. The steps I took:

  1. Install partclone (sudo apt-get install partclone)
  2. Prepare an img-file somewhere where enough free disk space is available:
    touch /dir-to-new-image/partition.img

    You should have at least as much free disk space as the size of the image there.

  3. Convert the clonezilla-image into the img-file:
    sudo cat /dir-to-images/partition.ext3.ptcl-img.gz.*
    | sudo gzip -d -c
    | sudo partclone.restore -C -s - -O /dir-to-new-image/partition.img

    (This is one line. Note the minus after -s. I overlooked it when I tried this first.)
    This will take some time, dependent on how big the image and how fast your drive(s).
    There are other commands in the forum thread for NTFS images and other compression formats.

  4. Mount the img-file:
    sudo mount -o loop -t ext3 /dir-to-new-image/partition.img /mnt

Thanks a lot to all posters of the forum mentioned above for these hints, especially bfitzhugh, nutria007, ttguy and gaebriel!

P.S.: It’s always good to have a (recent) backup 😉 One drive of mine just crashed after about two years in operation, so I know what I am talking about…

Think about what pain it would be if the drive of your laptop / desktop would crash just right now. If you get a bad feeling thinking about this, you should make a backup now.

14. February 2012

Horde language selection does not work

Filed under: Linux,Server Administration — Tags: , , , , , , , , — Christopher Kramer @ 13:22

When selecting a language at login, Horde webmailer does not change the language?

Here is what I found out what helps:

On Debian, run the following command:

dpkg-reconfigure locales

Then select the correct languages. I had only selected the UTF8 languages for German, but Horde needs the following ones:

de_DE ISO-8859-1
de_DE@euro ISO-8859-15

If you have the problem with another language, select the corresponding language.

On Ubuntu, the chosen languages are stored here:

/var/lib/locales/supported.d/

I had a file named “de” in there where my chosen languages where listed and I added the ISO-versions above. You can find all supported languages here:

less /usr/share/i18n/SUPPORTED

On Ubuntu, after you included your languages, you have to run the following command:

dpkg-reconfigure locales

Afterwards, you need to restart apache:

apache2ctl -k graceful

That’s the smoothest way. In case it does not work, use one of those:

apache2ctl restart
service apache2 restart
/etc/init.d/apache2 restart

Now refresh Horde and everything should work.

Another problem is the following: if you chose a language in your Horde settings (login, Global Options, Locale and time, Select your preferred language), this overwrites the language you chose on login. So select “default” there to be able to chose language on login.

Hope this helps somebody.

« Newer Posts