DeutschEnglish

Submenu

 - - - By CrazyStat - - -

6. April 2021

Open PHP Scripts in Browser from Windows Explorer

Filed under: PHP,Windows — Tags: , , , , , — Christopher Kramer @ 19:07

PHP is a scripting language, so a PHP parser is needed to run PHP scripts. Furthermore, a webserver like Apache is required to run web applications written in PHP. We assume you already have all that installed (e.g. you installed xampp). Now you have php files in your htdocs-folder and want to open them in the browser, parsed by php and served by your local webserver? But that requires the browser to point to http://localhost/ instead of file://C:/xampp/htdocs/. I solved this by opening a tiny PHP script in the browser that redirects to the correct location. Here is how to set it up:

  1. Download FileTypesMan (direct download link for x64)
  2. Unzip FileTypesMan and run FileTypesMan.exe . Confirm the UAC prompt.
  3. Click Edit / Find and enter “php” in the search field
  4. If you do not find a row with the extension “.php” in the table, then:
    a) Double click a php-file in explorer and assign a default application to launch. This could be a text editor like notepad++, and IDE like Visual Studio Code, or notepad.exe.
    b) In FileTypesMan click File / Refresh Desktop now and search again for “php”. You should find it now.
  5. While the row “.php” is selected, click Actions / New action.
  6. Assign an action name like Parse php and open in Firefox
  7. Click “Browse…” and select the executable of the browser that should get launched, e.g. C:\Program Files\Mozilla Firefox\firefox.exe
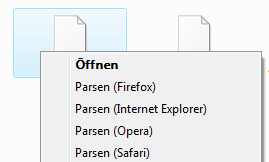
  8. Now change the Command-Line so that after the path to the browser, the first argument is "http://localhost/load.php?file=%1" . This makes the browser open said php-file parsed by localhost and pass the filepath as parameter file. It should look similar as in the screenshot.
  9. Select “Default Action” if you want this action to happen on double-click.
  10. Click OK. You may create similar actions for other browsers.
  11. Drop the file load.php in your htdocs document root folder with the following content:
<?php
$htdocs = $_SERVER["DOCUMENT_ROOT"];
$webserver = "http://".$_SERVER["HTTP_HOST"];
if(empty($_GET['file'])) $redirectTo = $webserver;
else {
    $file = trim(str_replace("%20", " ", str_replace("\\\\", "/", str_replace(DIRECTORY_SEPARATOR, '/', $_GET['file']))));
	$inDocumentRoot = strpos($file, $htdocs)!==false;
	if(!$inDocumentRoot) { 
	    die('The file is not in the document root!');
	}
	$redirectTo = $webserver.str_replace($htdocs,"",$file);
}
header('Location: '.$redirectTo);
exit;

Now you can launch php files right from the context menu in Explorer or through double click. You can delete FileTypesMan now.

Please drop a comment it this made your day.
Recommendation

Try my Open Source PHP visitor analytics script CrazyStat.

21. August 2020

Linux: Turn jpeg images lossless out of Nautilus

Filed under: Linux — Tags: , , , , , , — Christopher Kramer @ 22:13

Your camera does not always turn your images the correct way? You search for an easy way to turn multiple images in linux?

That’s the problem I just came across. And this is my solution:

In Nautilus, the default file manager in Ubuntu Linux and a lot of other linux distributions, you can easily run scripts out of the context menu. All you have to do, is place your script in the following directory:

~/.local/share/nautilus/scripts/SCRIPTNAME

Nautilus will pass the selected files as parameter. So all we need to do, is write a script that turns our image. I was searching for something that can turn .jpeg-images in a lossless way. This means, turning the image won’t reduce the image quality. A good tool for this job is jpegtran, which can be installed like this in Ubuntu:

sudo apt install libjpeg-progs

Now create the file ~/.local/share/nautilus/scripts/jpeg turn 90 with the following content:

#!/bin/bash
for FILE in "$@"; do
        jpegtran -rot 90 -outfile "$FILE" "$FILE"
done

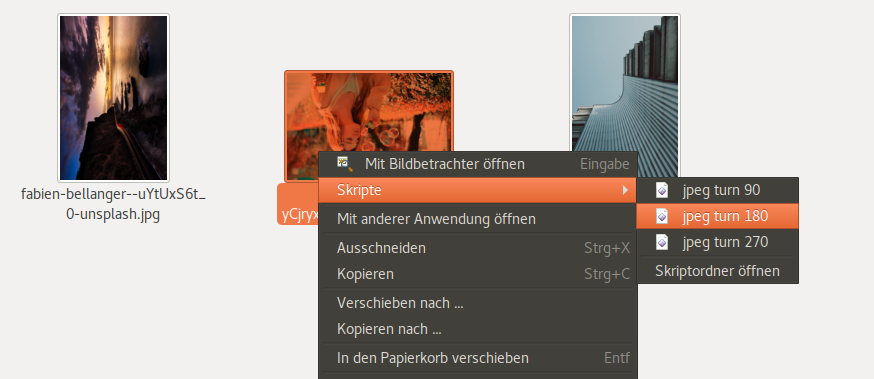
Now you can right-click jpeg files and turn them easily in Nautilus:

You can even select multiple images in Nautilus and turn all of them at once.

Now create jpeg turn 180 and jpeg turn 270 scripts with 180 and 270 after -rot instead of 90 in the script. This way, you can easily turn images by 180 or 270 degrees as well.

If this made your day, please drop a comment.

2. February 2020

MySQL root password in Ubuntu cannot be changed

Filed under: DBMS,Linux,Server Administration — Tags: , , , , , — Christopher Kramer @ 16:08

You tried a dozen different howtos to change the root password of MySQL (5.7+) in a recent Ubuntu version (18.04+) and did not succeed? Like the one I posted in 2013?

The reason these guides do not work is simple: root access through password is disabled and thus changing the password has no effect. You can find more details here.

So how the heck can we access the database? On the console, you can login to MySQL as root without a password like this:

sudo mysql

If you need root access from another application, like phpMyAdmin, the best way is to add a new user like myroot that has all privileges and a password. To do so, login as root in the console (sudo mysql) and then create the new user like this (adjust new_password to something more secure):

CREATE USER 'myroot'@'localhost' IDENTIFIED BY 'new_password';
GRANT ALL PRIVILEGES ON *.* TO 'myroot'@'localhost' WITH GRANT OPTION;
CREATE USER 'myroot'@'%' IDENTIFIED BY 'new_passord';
GRANT ALL PRIVILEGES ON *.* TO 'myroot'@'%' WITH GRANT OPTION;
FLUSH PRIVILEGES;
QUIT;

Now you can login from any application using the username myroot and the password new_password . On the console:

mysql -u myroot -p
Enter password: new_password

Hope this helps somebody who is in the same situation like me.

If this made your day, please drop a comment.

13. January 2020

TeXworks: Editor Window opens without Titlebar, no way to minimize

Filed under: Linux — Tags: , , , , , , , , , — Christopher Kramer @ 11:33

I was using TeXworks 0.6.2 to edit LaTeX files under Ubuntu Linux 18.04 (using Gnome with X11). Suddenly, a file that I had edited before would always open in a strange way. The preview window with the PDF would open normally. But the editor opened maximized without a titlebar, window border etc. So there was no way to minimize the editor window.

I tried to minimize the window using keyboard commands and the Window-Menu of the TeXworks editor. I managed to move the window to a different screen using keyboard commands, but still maximized without a titlebar. The window menu also did not work. Restarting TeXworks also did not help. Other files would open normally.

What finally helped: File / Remove Aux Files…
Afterwards, restart TeXworks.

I did not know that TexWorks stores window status information in aux-files. But it seems it does, as deleting these files solved the problem.

If this tip saved your day, please drop a comment. This motivates me to keep writing these kind of posts.

4. December 2019

letsencrypt certbot: how to remove some domains from an existing certificate

Filed under: Linux,Server Administration — Tags: , , , , — Christopher Kramer @ 21:44

You have a certificate with a couple of alternative domain names added to it, but want to get rid of some of them while keeping others? The parameter --renew-with-new-domains is what you want. This is how you use it:

certbot certonly --cert-name "maindomain.com" --renew-with-new-domains -d "maindomain.com,alternative1.com,alternative2.com"

This will renew the certificate maindomain.com with the domains maindomain.com, alternative1.com and alternative2.com. Any other domains that had been included in the certificate before will not be included in the new certificate. If you execute it like this, it will ask you for the verification method and parameters interactively. Alternatively, you can also configure this with parameters like -a webroot --webroot-path "/var/www/” .

VLC for Android stuck after sleep timer expired

Filed under: Uncategorized — Tags: , , , , , — Christopher Kramer @ 20:46
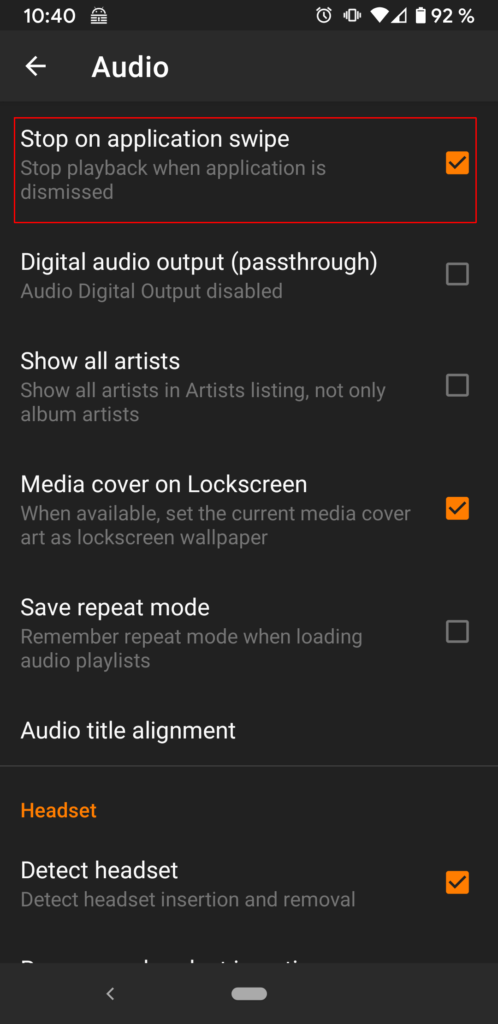
Enable the “Stop on application swipe” option in VLC so you can still close it when it is stuck.

The problem

VLC for android is a good media player for Android. It comes with a sleep timer, which is useful if you are listening to audio books before sleep. However, for me, it always gets stuck after the sleep timer expired. This means the players notification still looks like it was playing. But neither the notification can be swiped away nor the application. So there is no easy way to close the app. Play buttons do not work and I cannot start another audio file. So the app is completely stuck.

The workaround

There is an option in the VLC settings that makes the situation a lot better:

Settings / Audio / Stop on application swipe

Check this option and when VLC is stuck, you can at least close the app by swiping it away.

Saved your day?

If this tip saved your day, please drop a comment below to keep me writing these kind of blog posts.

8. November 2019

rspamd and redis: Random Connection refused errors

Filed under: Server Administration — Tags: , , , , , — Christopher Kramer @ 19:35

For some time, I am using rspamd as Spamfilter. By the way, I can really recommend it over Spamassasin / Amavisd-new solutions. I configured rspamd to use a redis database for the bayes filter, neural network etc.

Everything worked well until after some time, probably due to an update, it started spitting out Connection refused errors like these:

2019-11-07 06:25:10 #32043(normal) rspamd_redis_stat_keys: cannot get keys to gather stat: Connection refused
2019-11-07 06:25:15 #32042(normal) &lt;4n3xhp>; lua; neural.lua:855: cannot get ANN data from key: rn_default_default_t66yaxz4_0; Connection refused
2019-11-07 06:25:15 #32044(normal) &lt;4n3xhp>; lua; neural.lua:1101: cannot get ANNs list from redis: Connection refused
2019-11-07 06:25:15 #32040(controller) &lt;4n3xhp>; lua; neural.lua:1135: cannot exec invalidate script in redis: Connection refused

Not every connection to redis failed, but quite a lot. This is a Debian Stretch system with a local redis 3.2.6 database and rspamd 2.1 running on the same host. So network problems couldn’t be it. The redis logs did not even mention the failed connections, the MONITOR command of redis also did not show anything for the refused connections. Restarting redis didn’t change anything, but restarting rspamd solved the problem for about an hour, when the problem started again. I tried adjusting the linux open files limit, the number of maximum redis connections and timeout settings without any luck.

Finally, I found the setting that solved the problem. My redis configuration in /etc/rspamd/local.d/redis.conf had looked like this:

password = "somePassword";
write_servers = "localhost";
read_servers = "localhost";

Changing it to this solved the problem:

password = "somePassword";
write_servers = "127.0.0.1:6379";
read_servers = "127.0.0.1:6379";

The problem seems to be that localhost both resolves to an IPv4 address and an IPv6 address. Redis, however, is configured to only listen on the IPv4 address in /etc/redis/redis.conf:

bind 127.0.0.1

Rspamd seems to sometimes use the IPv4 address, which works, and sometimes the IPv6 address, which doesn’t. This is why the problem seems to occur randomly.

Hope this helps somebody to find the issue faster. If this saved your day, please drop a comment.

19. March 2019

PHP: DateTime::createFromFormat fails for string read from CSV

Filed under: PHP — Tags: , , , , , — Christopher Kramer @ 19:31

I wrote a small PHP script to import a dozen csv files exported from Excel into a database. The CSV import basically looked like this:

&lt;?php
$f = "file.csv";	
if (($handle = fopen($f, "r")) !== FALSE) {
    while (($data = fgetcsv($handle, 1000, ";")) !== FALSE) {
         $date = DateTime::createFromFormat('d.m.Y', $data[0]);
         // Inserting this along with other data into a DB
    }
} ?>

And now what happened is that $date was false. So I fetched the errors like this:

var_dump(DateTime::getLastErrors());

And this returned:

array(4) {
  ["warning_count"]=>
  int(0)
  ["warnings"]=>
  array(0) {
  }
  ["error_count"]=>
  int(1)
  ["errors"]=>
  array(1) {
    [0]=>
    string(22) "Unexpected data found."
  }
}

So I added var_dump($date), but it gave string(13) "31.01.2019", which looked right. But looking closely, the string length of 13 seems a bit long for a 10 character date, right? I tried trim() , but without luck. And then I remembered that I had a similar problem before where invisible empty space was due to the UTF-8 Byte Order Mark (BOM). This is a sequence of “inivisible” bytes at the beginning of a textfile that define in which unicode encoding the file is (UTF-8, UTF-16, …) and its endianess (big-endian or little-endian). Microsoft Office programs such as Excel or Word like to write this to the beginning of a file, but other programs may do so as well.

So the solution is simple: In the first line, strip the BOM if it is there:

&lt;?php
$f = "file.csv";
$bom = pack('CCC', 0xEF, 0xBB, 0xBF);
$firstline=true;
if (($handle = fopen($f, "r")) !== FALSE) {
    while (($data = fgetcsv($handle, 1000, ";")) !== FALSE) {
         if ($firstline and substr($data[0], 0, 3) === $bom)
             $data[0] = substr($data[0], 3);
         $firstline=false;
         $date = DateTime::createFromFormat('d.m.Y', $data[0]);
         // Inserting this along with other data into a DB
    }
} ?>

So this just checks whether the first three bytes in the file match the UTF-8 BOM added by Excel and in case it detects them, it remove these bytes. Now the date parses fine. If your file has a different BOM, e.g. for UTF-16, you may need to change the definition of $bom. Just check your file in a hex-editor to find the first three bytes. This is PSPad, a great text-editor that includes a HEX-editor:

Note the first three bytes EF BB BF, which are the BOM.

If this helped you to solve your problem faster, please drop a comment below. This motivates me to keep writing these articles.

4. January 2019

Mit dem Navi Diesel-Fahrverbote umfahren

Filed under: Uncategorized — Tags: , , , , , — Christopher Kramer @ 20:14

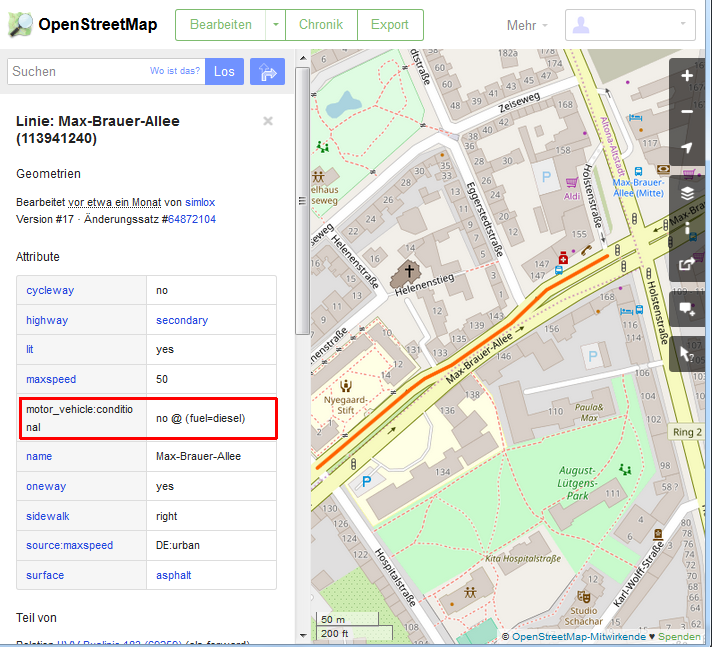
Hamburg hat als erste deutsche Stadt Fahrverbote für Diesel (Euro 4 und älter) eingeführt. Betroffen sind zunächst nur ca. 600 Meter der Max-Brauer-Allee und ca. 1,6km der Stresemannstraße. Wer mit seinem Euro 4 Diesel in Hamburg unterwegs ist, muss also den Umleitungsschildern folgen. Praktischer wäre es, wenn das Navi die gesperrten Straßen direkt von sich aus vermeiden würde. Ich habe mir die Eigenschaften der betroffenen Straßen in OpenStreeMap angesehen. Sie haben aktuell das Attribut mit dem Schlüssel motor_vehicle:conditional und dem Wert no @ (fuel=diesel), wie hier ein Abschnitt der Max-Brauer-Allee:

Dieselfahrverbot in OpenStreetMap

Da die Daten also schon in OpenStreeMap vorliegen, kann man nun Navis, welche auf OpenStreetMap-Karten basieren, beibringen diese Straßen auf Wunsch zu umfahren.

Das beliebte OsmAnd bietet die Möglichkeit, die Routing-Profile leicht selbst anzupassen. Dazu muss nur eine routing.xml Datei angepasst und auf dem Smartphone abgelegt werden.

Ich habe mir die routing.xml von github heruntergeladen. Innerhalb des Routing-Profils für Autos (car) habe ich zunächst einen neuen Parameter eingefügt, mit dem man in der Oberfläche einstellen kann, ob Dieselfahrverbote gemeidet werden sollen oder nicht:

Als nächstes muss definiert werden, was geschehen soll, wenn der Benutzer die Option aktiviert hat. Dazu habe ich folgende Regel eingefügt, welche die Straßen mit dem oben genannten Parameter meidet:

Diese Regel lässt OsmAnd für Diesel gesperrte Straßen vermeiden.

Die angepasste routing.xml hier downloaden. Wie in der Datei selbst steht, muss man sie i.d.R. an eine der folgenden Orte ablegen:

  • /sdcard/Android/data/net.osmand.plus/files/
  • /storage/emulated/0/Android/data/net.osmand.plus/files
  • /data/user/0/net.osmand.plus/no_backup

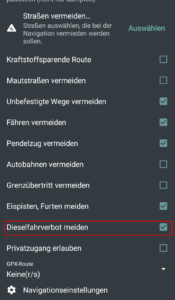
Ich habe sie unter /storage/emulated/0/Android/data/net.osmand.plus/files abgelegt, da dieser Ordner bei mir existierte. OsmAnd dann schließen (zur Seite wischen) und neu öffnen. Nun sollte in den Routingoptionen die neue Option erscheinen:

Die Option in den Routingeinstellungen

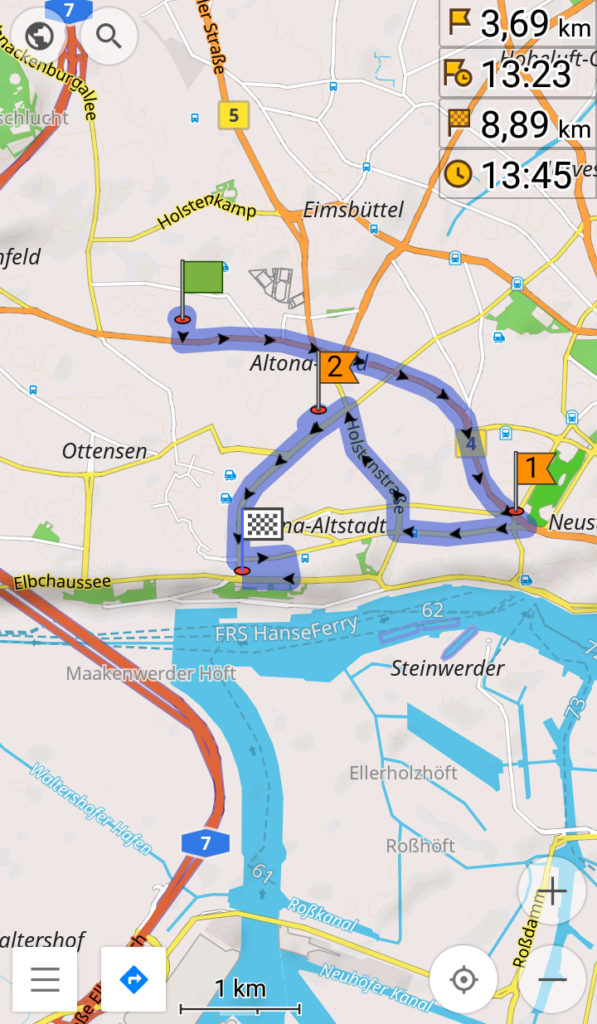
Wenn man nun Routen innerhalb Hamburgs berechnet, die normalerweise die für Diesel gesperrten Routen nutzen würden, kann man sehen, dass es funktioniert. Hier eine Route, die beide Straßen nutzt:

Route in Hamburg, auf der Dieselfahrverbote gelten

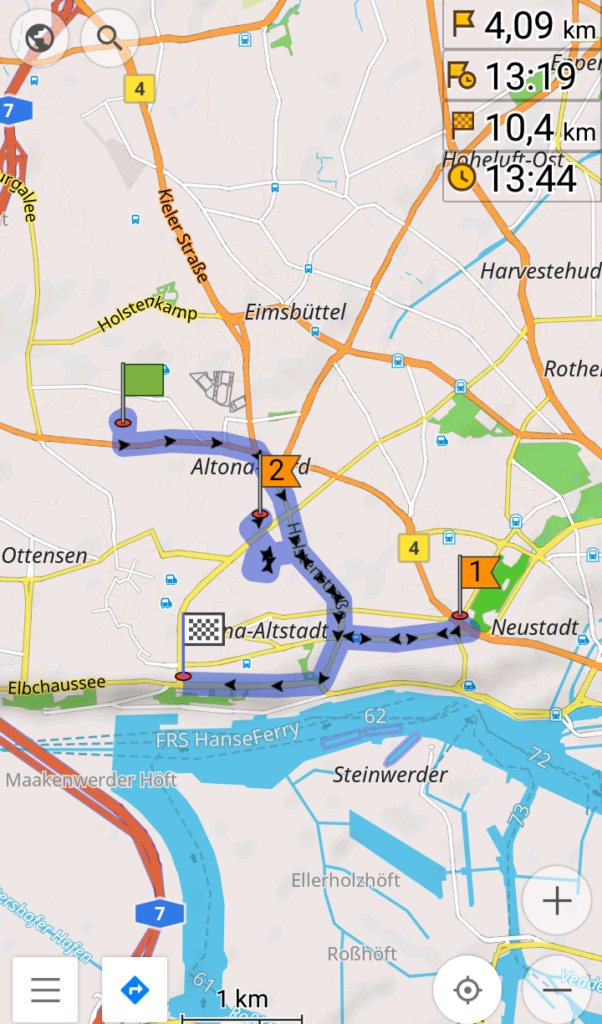
Aktiviert man nun die Option zum Meiden von Dieselfahrverboten, sieht die Route deutlich anders aus und meidet die gesperrten Straßen:

Alternative Route durch Hamburg ohne Dieselfahrverbote

Fahrverbote in Stuttgart und anderen Regionen

Ab dem 01.01.2019 gelten nun auch großflächige Dieselfahrverbote in Stuttgart. Leider funktioniert dieser Ansatz (aktuell) nicht für Stuttgart. Er vermeidet Straßen, welche das oben genannte Attribut aufweisen. In Stuttgart sind aber nicht einzelne Straßen, sondern das gesamte Stadtgebiet (genauer: die ausgewiesene Umweltzone) gesperrt. Ich habe erst heute in OpenStreetMap die bereits vorhandene Markierung der Umweltzone mit dem obigen Attribut versehen. Bis dies in den OsmAnd-Karten landet, wird es noch bis zu einen Monat dauern (außer man hat das Karten-Abo). Da es sich bei der Stuttgarter Umweltzone aber um eine Fläche und keine Straße handelt, werden wahrscheinlich noch Anpassungen an der routing.xml nötig, damit OsmAnd die Dieselfahrverbote in Stuttgart berücksichtigen kann. Sobald es hierzu neues gibt, werde ich diesen Artikel aktualisieren.

29. August 2018

phpBB: Upgrade fails (timeout) – solution and how to update on the CLI

Filed under: PHP,Server Administration — Tags: , , , , , , , — Christopher Kramer @ 10:46

So if you are getting a Timeout when updating phpBB to 3.2.2, it tells you to either increase the maximum time limit or do the update on the CLI.

How to update on the CLI

Of course, this requires that you have access to the CLI.

  • On the CLI, go into the install folder of phpBB
  • Create a file named config.yml that contains this:
    updater:
        type: db_only
  • Make sure the above file does not end with newlines
  • Run:
    php ./phpbbcli.php update config.yml

Fixing the update timeout problem

In my case, the CLI update gave this error:

PHP Fatal error:  Call to a member function fetch_array() on resource in [...]/install/update/new/phpbb/db/migration/data/v32x/fix_user_styles.php on line 42

This is a bug in the migration script. The most easy way to fix it, is to go into your config.php and change the $dbms from mysql to mysqli. This is recommended anyway.

If this is not possible for you, open the mentioned file and search for:

$enabled_styles = $result->fetch_array();

And replace this with:

$enabled_styles = $this->db->sql_fetchrowset($result);

Thanks to RMcGirr83 and Marc on this thread.

Older Posts »