DeutschEnglish

Submenu

 - - - By CrazyStat - - -

2. February 2020

MySQL root password in Ubuntu cannot be changed

Filed under: DBMS,Linux,Server Administration — Tags: , , , , , — Christopher Kramer @ 16:08

You tried a dozen different howtos to change the root password of MySQL (5.7+) in a recent Ubuntu version (18.04+) and did not succeed? Like the one I posted in 2013?

The reason these guides do not work is simple: root access through password is disabled and thus changing the password has no effect. You can find more details here.

So how the heck can we access the database? On the console, you can login to MySQL as root without a password like this:

sudo mysql

If you need root access from another application, like phpMyAdmin, the best way is to add a new user like myroot that has all privileges and a password. To do so, login as root in the console (sudo mysql) and then create the new user like this (adjust new_password to something more secure):

CREATE USER 'myroot'@'localhost' IDENTIFIED BY 'new_password';
GRANT ALL PRIVILEGES ON *.* TO 'myroot'@'localhost' WITH GRANT OPTION;
CREATE USER 'myroot'@'%' IDENTIFIED BY 'new_passord';
GRANT ALL PRIVILEGES ON *.* TO 'myroot'@'%' WITH GRANT OPTION;
FLUSH PRIVILEGES;
QUIT;

Now you can login from any application using the username myroot and the password new_password . On the console:

mysql -u myroot -p
Enter password: new_password

Hope this helps somebody who is in the same situation like me.

If this made your day, please drop a comment.

Recommendation

Try my Open Source PHP visitor analytics script CrazyStat.

26. March 2017

Zimbra: fix corrupt index open_conversation in an mboxgroup MySQL-DB

Filed under: DBMS,Linux,Server Administration — Tags: , , , , , , — Christopher Kramer @ 20:50

Just wanted to upgrade a Zimbra server from 8.7.3 to 8.7.5. The upgrade always asks you whether to check database integrity. Even it was only a minor upgrade, I chose yes to be on the safe side. And it turned out the MySQL DB was indeed corrupt.

I had seen corrupt zimbra dbs a lot and the “MySQL crash recovery” guide in the zimbra wiki always helped out. But not this time.

I tried the crash recovery as explained in the wiki. When doing dumps, four mboxgroup-databases always failed because the index open_conversation of the table open_conversation was corrupt. As the guide explains, I increased innodb_force_recovery step by step from 1 to the maximum 6, but the error did not go away.

So here is what helped:

  1. Try to create the dumps as explained in the crash recovery guide. You will get errors like this:
    Dumped mboxgroup8
    mysqldump: Error 1712: Index open_conversation is corrupted when dumping table `open_conversation` at row: 0
    Dumped mboxgroup9

    This means that mboxgroup9 (not 8!) is corrupt. Write down all the mboxgroup numbers where an error appeared.

  2. Remove  innodb_force_recovery from the my.cnf if you inserted it
  3. Login as zimbra
    su zimbra
  4. Restart the mysql server
    mysql.server restart
  5. Load the MySQL account data into shell variables
    source ~/bin/zmshutil ; zmsetvars
  6. Log into MySQL using the root account
    mysql -u root --password=$mysql_root_password
  7. Open the first database that is corrupt:
    USE mboxgroup9;
  8. Repair the corrupt open_converstation table:
    OPTIMIZE TABLE open_conversation;

    Note: If this fails, check if you really removed innodb_force_recovery from the my.cnf!

  9. Go back to step 7 and open the next database that is corrupt until all have been repaired.
    Now exit the MySQL prompt:

    exit;
  10. You can now continue with the crash recovery, it should now create all dumps correctly. But if the open_conversation tables where the only corruption problem, you could also just stop here as this should have fixed the corruption. In my case, I jus started the upgrade again and let it verify message store database integrity again, and this time it completed with “No errors found”. 🙂
  11. Clean up the MySQL dumps
     rm -R /tmp/mysql.db.list /tmp/mysql.sql/

Please let me know if this helped you or if you have some additions.

15. July 2016

Request-Tracker4: Enabling fast fulltext search with Sphinxsearch on Debian Jessie

I just successfully made fulltext search in our request tracker super fast. This is a guide for Debian Jessie and request tracker set up to use MySQL (or MariaDB).

  • Don’t forget to backup your RT database:
    mysqldump -p -u root rtdb > rtdb.sql
  • Log out of request tracker. I had some strange issue because I did not 😉
  • Make sure you are using request-tracker4 version 4.2.12 from jessie-backports. If you don’t already, this is how you update:
    – add this to the end of your /etc/apt/sources.list:

    deb http://ftp.debian.org/debian jessie-backports main

    – run

    apt-get update

    – install request-tracker4 from jessie-backports:

    apt-get -t jessie-backports install request-tracker4

    – follow the update procedure, make sure your database is upgraded
    (We need the package from backports as jessie’s rt4-db-mysql package depends on mysql-client, whereas the backports version depends on virtual-mysql-client and thus can also be easily used with MariaDB.)

  • Second, make sure you are using MariaDB instead of MySQL. MariaDB is a drop-in replacement for MySQL. The big advantage of MariaDB here is that it comes with the SphinxSE storage engine that we will use for the fulltext search. SphinxSE is also available for MySQL, but you would need to compile it yourself whereas MariaDB includes SphinxSE by default. MariaDB has also a lot more advantages. Switching to MariaDB is very simple, no need to convert databases or configuration. I used aptitude and selected to install mariadb-client and maridb-server. Then I checked the dependency resolutions and choose the option to uninstall mysql-client, mysql-server and related packages. Then everything went smooth automatically, I just needed to enter the root password again, everything else was updated automatically.
  • Now check if your RT is still working well with MariaDB.
  • Now enable the SphinxSE storage engine in MariaDB:
    mysql -u root -p
    [enter password]
    INSTALL SONAME 'ha_sphinx';
    SHOW ENGINES;
    EXIT;
  • Now install the Sphinxsearch daemon:
    apt-get install sphinxsearch
  • Now set up indexed full text search in RT:
    rt-setup-fulltext-index --dba root --dba-password secret

    (Let me know if you find a way without passing the password as a parameter)
    This asks you what type of index you want to use. Enter “sphinx”. Then keep the defaults.

  • The command above gave you code for /etc/request-tracker4/RT_SiteConfig.pm – like this:
    Set( %FullTextSearch,
        Enable     => 1,
        Indexed    => 1,
        MaxMatches => '10000',
        Table      => 'AttachmentsIndex',
    );

    Add / adjust this in RT_SiteConfig.pm.

  • Then you need to configure the index in sphinx. The above tool also gave you a config file for this, but it does not work with the current sphinxsearch version of jessie. So here is what works. Create an /etc/sphinxsearch/sphinx.conf like this:
    source rt {
        type            = mysql
    
        sql_host        = localhost
        sql_db          = rtdb
        sql_user        = rtuser
        sql_pass        = RT_PASSWORD
    
        sql_query_pre   = SET NAMES utf8
        sql_query       = \
            SELECT a.id, t.Subject, a.content FROM Attachments a \
            JOIN Transactions txn ON a.TransactionId = txn.id AND txn.ObjectType = 'RT::Ticket' \
            JOIN Tickets t ON txn.ObjectId = t.id \
            WHERE a.ContentType LIKE 'text/%' AND t.Status != 'deleted'
    
    #    sql_query_info  = SELECT * FROM Attachments WHERE id=$id
    }
    
    index rt {
        source                  = rt
        path                    = /var/lib/sphinxsearch/data/rt
        docinfo                 = extern
    #    charset_type            = utf-8
    }
    
    indexer {
        mem_limit               = 32M
    }
    
    searchd {
        listen                  = 3312
        log                     = /var/log/sphinxsearch/searchd.log
        query_log               = /var/log/sphinxsearch/query.log
        read_timeout            = 5
        max_children            = 30
        pid_file                = /var/run/sphinxsearch/searchd.pid
    #    max_matches             = 10000
        seamless_rotate         = 1
        preopen_indexes         = 0
        unlink_old              = 1
        # For sphinx >= 1.10:
        binlog_path             = /var/lib/sphinxsearch/data
    }

    Make sure to adjust the mysql database, user and password.
    Note that there are some differences to the config provided by rt-setup-fulltext-index. Especially, you need to use listen instead of port. If you don’t adjust this, sphinxsearch will start on a different port and RT will not find any results in fulltext searches! If your RT is not behind a firewall, better also set listen to 127.0.0.1:3312 . Also, I used the Debian style paths from the Debian sample. The fields commented out are not necessary anymore in current sphinxsearch.
    UPDATE 26.08.2016: I changed the SQL Query to also index the Subject of the tickets and index all ‘text/%’ types and not only ‘text/plain’. This change is based on a comment by Claes Merin in the Request Tracker Mailing List. Thanks a lot. Without this change, the fulltext search will only search within ticket content, but not within ticket titles… Also, before it would not index text/html attachments.

  • Now run the indexer to build the initial index. This will take some time, for a 6 GB Attachments Table, it took not more than 30 minutes. Maybe run this in a screen in case your ssh connection breaks:
    indexer rt
  • Enable the Sphinx daemon. To do so, adjust START to yes in /etc/default/sphinxsearch
  • Finally, start the sphinxsearch daemon:
    /etc/init.d/sphinxsearch start
  • Now you can log into RT and do a fulltext search by entering in the search field:
    fulltext:search_word
  • In my case, this made the fulltext searches run within a second instead of 5 minutes 🙂
  • Make sure the indexer is run regularily to update the index. To do so, enter
    crontab -e

    And add a line like this:

    13 * * * * /usr/bin/indexer rt --rotate

I hope this helps somebody to setup this a little faster.


1. September 2013

MySQL: reset a forgotten MySQL root password

Filed under: DBMS,Linux,Security,Server Administration — Christopher Kramer @ 14:37

Just in case you don’t know the password of your MySQL root user anylonger, this is how you can set a new one.

Windows users, follow this guide.

Linux / Unix users: This is for Debian (wheezy) and MySQL 5.5, but should work more or less the same on any linux/unix:

Either do this as (linux user) root or prefix every command with sudo:

  1. Stop the MySQL server
    service mysql stop
  2. Create a init file:
    touch /etc/mysql/mysql-init
  3. Write the following into this file (adjust the PW):
    SET PASSWORD FOR 'root'@'localhost' = PASSWORD('MyNewPassword');
  4. Restart MySQL with this init-file:
    mysqld_safe --init-file=/etc/mysql/mysql-init
  5. The new password should work now. Try it:
    mysql -u root -p
  6. Restart MySQL normally:
    service mysql restart
  7. Remove the init-file
    rm /etc/mysql/mysql-init

And you’re done. I hope this helps somebody.

Note: if it does not work, it is most likely because the MySQL process cannot access the init-file (e.g. because of missing access rights). In this case check your (sys)logs for stuff like this:

mysqld: 130901 14:20:30 [ERROR] /usr/sbin/mysqld: File '/root/mysql-init' not found (Errcode: 13)

I had this problem first because I tried creating the init-file in /root where the mysql-process was not able to read it.

11. August 2013

RT Request Tracker: Migrate From SQlite to mySQL

Filed under: DBMS,Linux,Server Administration — Tags: , , , , , , — Christopher Kramer @ 23:07

I lately had to migrate an RT installation (version 4.0.4) from SQLite to MySQL. In case anyone else has to do this, here is a brief description of how it worked out.

  1. Setup a working MySQL server in case you have not already
  2. Create a MySQL user for RT (e.g. rt4)
  3. Configure RT to use MySQL using this username and a dbname (e.g. rt4) of a not yet existing db (See /etc/request-tracker4/RT_SiteConfig.pm and RT_SiteConfig.d/)
    I’d recommend to keep a copy of the SQlite-Config…
  4. Run
    rt-setup-database --action init

    to create a blank RT DB in MySQL. Check if it worked.

  5. Delete all rows from the MySQL DB, only keep the schema.
  6. Create a copy of your SQLite db
    cp rtdb mydbcopy
  7. Open the copy of the db in the sqlite shell
    sqlite3 mydbcopy
  8. For each table in the DB:
    1. Set the Output file to something like this (“Attachments” is the table name)

    .out data_Attachments

    2. Set the mode to insert (“Attachments” is again the table name)

    .mode insert Attachments

    3. Get all the data

    SELECT * FROM Attachments;

    4. Now you have a file with lots of INSERT statements for the Attachments table. Try to run it in mysql:

    mysql -u rt4 -p rt4 < data_Attachments

    (On a linux shell, not the sqlite shell of course. Here the first rt4 is the username and the second the dbname. data_Attachments is the dump file created before)
    5. In case mysql complains some NOT NULL constraints are violated:
    Go back to the sqlite shell and set these cells to the default-value (0):

    UPDATE Attachments SET someColumn=0 WHERE someColumn IS NULL;

    (Only do this on the copy, not the original db 😉 )
    Now recreate the dump and retry to insert this in mysql. Do it with all columns where NOT NULL constraints are violated.

This works table by table, there are no foreign keys that would get in the way. You can also do several tables in one output file, but you might run into problems when NOT NULL constraints are violated by one table. After all your tables are filled with your data, RT should work. Maybe restart Apache.

apache2ctl restart

This worked without problems so far for me. I first tried pumping the whole SQLite dump into MySQL (using this conversion script) but the schema that this ended up in was different, missed indexes and RT only liked it until I restarted Apache (which then refused to start). Better start with a schema created by rt-setup-database, not with one that originates from SQLite.

I hope this is of some help for somebody. Please let me know in case it helped you or if you have any comments or questions.

18. March 2013

phpLiteAdmin 1.9.4 released

Filed under: DBMS,PHP,phpLiteAdmin — Tags: , , , , , , , , , , — Christopher Kramer @ 18:53

I just released phpLiteAdmin 1.9.4. phpLiteAdmin 1.9.4

phpLiteAdmin is for SQLite what phpMyAdmin is for MySQL: A web GUI to manage your databases.

A lot of work has again gone into this release. It fixes bugs and introduces new features. No security issues fixed (compared to 1.9.3.3).

Every user of phpLiteAdmin is recommended to update.

New features of phpLiteAdmin 1.9.4 include:

  • Multi-Language support
  • external configuration possible
  • empty password -> no login required
  • easy backup of db files
  • edit and delete possible from search results
  • search function: added “LIKE %…%”
  • css and Js now served as separate, cacheable and compressed resources to speed up page loading

Important bug fixes include fixes in the ALTER TABLE support. We have again spent quite a lot of work to improve phpLiteAdmin. Thanks to everybody who reported issues and especially to the team for your work on phpLiteAdmin – especially Dreadnaut and Teryaki helped me a lot in this release. Thanks guys.

Download the new version here.

3. November 2012

phpLiteAdmin 1.9.3 released (security-update)

Filed under: DBMS,PHP,phpLiteAdmin,Security,Server Administration — Tags: , , , , , , , , , , — Christopher Kramer @ 00:45

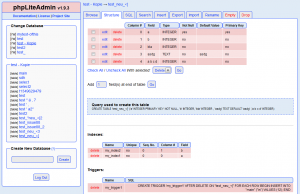
Screenshot of phpLiteAdmin 1.9.3

Screenshot of phpLiteAdmin 1.9.3

Some minutes ago, I released the new version of phpLiteAdmin, a web management GUI for SQLite databases written in PHP. You can download it from our project site.

The new version addresses and mostly fixes lots of issues. Among these, one security issue has been fixed. Therefore, I’d recommend anybody using phpLiteAdmin to update.

A lot of work has gone into this release, fixing lots of bugs to make phpLiteAdmin more robust. For example, you can now have tables or columns containing special characters. The ALTER TABLE features have been partly rewritten so they now work a lot more reliable. And lots of other issues have been fixed. Thanks to anybody who reported bugs to the bug tracker.

If you still have any problems or suggestions, please let us know on our issue tracker.

7. October 2012

SQLite: escaping table and column names correctly

Filed under: DBMS,PHP,phpLiteAdmin — Tags: , , , , , , , , , , — Christopher Kramer @ 21:44

Summary:

Use double quotes around column names, table names, trigger names etc.

SELECT "column name", "my column", FROM "table name"

Use single quotes around string values

SELECT * FROM "table name" WHERE "column name" = 'string value'

Use two double quotes if e.g. your column name contains a double quote (e.g. my”column)

SELECT "my""column" FROM "my""table"

Details:

I joined the development team of phpliteadmin some months ago and am currently fixing several issues. One problem is caused by SQLite’s flexibility of column- and table names. A column named “SELECT”, “my column”, “this, that”, or even “this contains ‘single quotes'” is completely legal in SQLite. And what is legal is being used. So phpliteadmin needs to be able to handle these types of names as well, which is not really the case at the moment.

Let’s assume you query a column called “select”, you are likely to get errors like that in PHP:

Warning: SQLiteDatabase::query() [sqlitedatabase.query]: near “select”: syntax error in …

Or using PDO:

HY000 / 1 / near “select”: syntax error

From MySQL I knew backticks around table or column identifiers like in this example:

SELECT `select`, `my column`, `this, that` FROM `group by table`

(By the way, you see my syntax highlighter has problems with reserved words as column names as well ;-))

I tried this in SQLite and it worked, so I went that way. But there are different versions of SQLite and for the old version that, in PHP, is implemented by SQLiteDatabase, would give the following error:

Warning: SQLiteDatabase::query() [sqlitedatabase.query]: unrecognized token: “`” in …

So I found out that instead of backticks, normal single quotes work:

SELECT * FROM 'group by table'

This works well, but there is a problem here with column names:

SELECT 'select' FROM 'group by table'

This will not work as expected. It will not return the values of the column ‘select’, but create a column filled with the text ‘select’. That is of course standard SQL behaviour and shows that it is a bad idea to use single quotes around column or table names. The bug report by maitredede on the phpliteadmin issue tracker made me aware of another way to escape column and table names:

SELECT [select], [my column], [this, that] FROM [group by table]

This works very well, both with SQLiteDatabase, SQLite3 and PDO when accessing SQLite from PHP. I have not tried it using the SQLite C library directly, but it should work as well.

So I’d say this is the best way to do this as it works the same way with all versions of SQLite / all PHP SQLite extensions.


Update:

Well, probably I should have read the manual first:

SQlite supports ` for compatibility with MySQL and [] for compatibility with MS Access and SQL Server. But it also supports double quotes, which is standard SQL. So I’d say this is the best way to do it:

SELECT "select", "my column", "this, that" FROM "group by table"

It works with all SQLite versions / extensions just like the [] syntax. (And my syntax highlighter supports it as well ;-).)

Update 2:

Another thing that might be of interest: What to do, if a column/table name contains double quotes? Well, in this case duplicate them and you are done. Let’s assume you have a column called like this:

my “column

Then you query it like this:

SELECT "my""column" FROM "my_table"

4. October 2012

PDO / sqlite: database table is locked

Filed under: DBMS,PHP,phpLiteAdmin — Tags: , , , , , , , — Christopher Kramer @ 22:06

At the moment I am working again on phpliteadmin, a  php-based web GUI for database administration of sqlite databases. While debugging, I stumbled across a problem that only occurred with the PDO extension (not with SQLiteDatabase or SQLite3). I got the following error message while trying to drop a table:

HY000 / 6 / database table is locked

By the way, you can use PDO::errorInfo() to get these error messages. So as the error correctly explains, the table I tried to drop seemed to be in use. PDO documentation for PDO::query() also explains the problem (even though DROP TABLE statements are fired using PDO::exec()):

If you do not fetch all of the data in a result set before issuing your next call to PDO::query(), your call may fail. Call PDOStatement::closeCursor() to release the database resources associated with the PDOStatement object before issuing your next call to PDO::query().

So I hunted for the open cursor on a resultset of the table in question and could not find any. Finally, I found the SQL statement which still had an open cursor:

SELECT * FROM sqlite_master

Thinking about this, it is obvious: When querying sqlite_master, you request information about database tables. If one of the table gets altered or dropped, this might change the data listed in the resultset on which I still have a cursor.

Maybe this is a special case as usually you do not query sqlite_master a lot. But in case you do, this might be useful information.

To solve the problem, as the manual says, simply release the cursor using PDOStatement::closeCursor() before dropping/altering tables.

14. August 2012

MySQL: How to do a (simple/complex) CHECK CONSTRAINT?

Filed under: DBMS — Tags: , , , , , , , , , — Christopher Kramer @ 02:27

Another “badly-missing-feature”-post. I should create a category for that I guess…

Usually, you can add a constraint to a table in SQL with something like:

ALTER TABLE foo ADD CONSTRAINT my_constraint CHECK (bla<>0)

Some sites like w3school even tell you this is the syntax for it in MySQL. Well, I guess they have never tried this and not even read the manual. Well, you can execute it in MySQL without an error. But also without any effect whatsoever. I tried it in InnoDB (MySQL 5.5) and it did not check the constraint at all.

The MySQL manual says:

The CHECK clause is parsed but ignored by all storage engines

Hallelujah, MySQL is great. A bug request for that exists since 2004, so don’t expect it to be fixed soon…

So we go with a trigger instead. For constraints, we use a BEFORE trigger. So next thing I tried looked something like this:

CREATE TRIGGER check_my_constraint BEFORE UPDATE ON `foo`
     FOR EACH ROW 
     BEGIN 
     IF (NEW.bla=0)
     THEN 
     ROLLBACK;
     END IF; 
     END

Should work, but doesn’t. Problem is that MySQL doesn’t like ROLLBACK here. Hallelujah, MySQL is great. So what worked in the end is sending an error signal:

CREATE TRIGGER check_my_constraint BEFORE UPDATE ON `foo`
     FOR EACH ROW 
     BEGIN 
     DECLARE msg varchar(255);
     IF (NEW.bla=0)
     THEN 
        SET msg = concat('Constraint my_constraint violated: bla must not be zero ', cast(new.bla as char));
        SIGNAL sqlstate '45000' SET message_text = msg;
     END IF; 
     END

Thanks to Rui Da-Costa for the solution with the SIGNAL.

The cool thing about triggers is that you can do complex checks here. So I just used it for something like:

 IF (NEW.ref_id IS NOT NULL AND
     NEW.ref2_id<>(SELECT `ref2_id` FROM `ref` WHERE `ref`.id=NEW.`ref_id`))

So that makes sure that ref_id is either null or it refers to a row in table `ref` with this id that has the same ref2_id as the table we are checking. So a more complex type of foreign key relationship.

Hope this helped somebody to get things solved more quickly. Don’t forget to add an INSERT trigger as well.

Another remark: Make sure you do not use semicolon as delimiter when using SQL/PL syntax. phpMyAdmin has an extra field to change the delimiter (below the textarea where you enter your SQL) for example.

Older Posts »